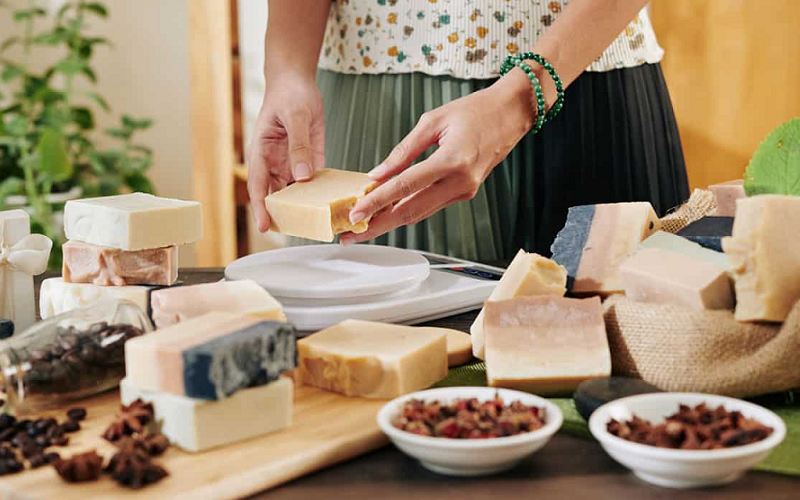
Soap making is a timeless craft that has been around for centuries. While it was once a necessity for everyday life, it has now become a hobby for many people looking for a creative outlet. Making soap from scratch allows you to create customized bars tailored to your preferences and needs.
What Is Soap Making?
Soap making is the process of combining ingredients to produce a cleansing bar that removes dirt and grime from the skin. Historically, soap was made using animal fats and wood ash, but today’s soap makers often use a combination of oils and lye.
The basic process of soap making involves mixing lye, which is a caustic chemical, with water. The lye water is then mixed with oils and butters, such as coconut oil, shea butter, or olive oil, to create a thick, creamy mixture. Once the mixture has been thoroughly combined, it is poured into molds and left to harden.
The chemical reaction that takes place when lye is mixed with oils is called saponification. During this process, the lye and oils are transformed into soap and glycerin. Glycerin is a natural humectant that draws moisture to the skin, leaving it feeling soft and moisturized.
Soap makers can customize their bars by adding scents and colors. Fragrance oils and essential oils are often used to add a pleasant aroma to the soap. Natural colorants such as herbs, spices, and clays can be added to give the soap a unique look.

Basic Soap Making Process
The basic soap making process involves combining lye and oils to create a chemical reaction called saponification. This process creates soap and glycerin, a natural humectant that draws moisture to the skin. Here is a step-by-step guide to the basic soap making process:
Ingredients needed:
- Lye
- Water
- Oils and butters (such as coconut oil, shea butter, or olive oil)
Equipment needed:
- Safety goggles and gloves
- Stainless steel pot
- Digital scale
- Stick blender
- Thermometer
- Soap mold
Safety precautions:
Lye is a caustic chemical that can cause burns if it comes into contact with skin or eyes. It is important to wear safety goggles and gloves and to work in a well-ventilated area. Never pour water into lye; always pour lye into water to avoid a dangerous chemical reaction.
Step-by-step instructions:
- Measure the lye and water: Weigh the lye using a digital scale and measure the water in a separate container. Slowly pour the lye into the water while stirring continuously with a heat-resistant spoon. Be careful not to splash the mixture or inhale the fumes.
- Prepare the oils and butters: Weigh the oils and butters and heat them in a stainless steel pot until they are melted and combined. Use a thermometer to ensure the temperature is between 100-120 degrees Fahrenheit.
- Mix the lye water and oils: Once both the lye water and oils have cooled to around 100-120 degrees Fahrenheit, pour the lye water into the pot with the oils. Use a stick blender to blend the mixture until it reaches a thick, creamy consistency.
- Add scent and color: At this point, you can add fragrance oils, essential oils, and natural colorants such as herbs, spices, or clays to the mixture. Mix well until the scent and color are evenly distributed.
- Pour into mold: Pour the mixture into a soap mold and tap it gently on a flat surface to remove any air pockets. Cover the mold with a piece of cardboard or plastic wrap to insulate it.
- Cutting and curing: After 24-48 hours, the soap will be hard enough to remove from the mold. Cut the soap into bars and place them on a rack to cure for 4-6 weeks. During this time, the soap will continue to harden and lose excess water, resulting in a longer-lasting bar.
The basic soap making process can be modified to suit individual preferences and needs. Once you have mastered the basic process, you can experiment with different oils, scents, and colors to create your own unique and fragrant bars of soap.

Types of Soap Making
There are three main types of soap making: cold process, hot process, and melt and pour. Each method has its own unique advantages and disadvantages, and the choice of which method to use often depends on the soap maker’s skill level, time constraints, and desired outcome.
Cold Process Soap Making
Cold process soap making involves mixing lye and oils at room temperature. This method allows for more creative freedom in terms of design, as the soap takes longer to harden and allows for swirls and other decorative techniques. The curing time for cold process soap is typically 4-6 weeks, which allows for a longer-lasting bar. However, this method requires careful measurement of ingredients and temperature control to ensure a safe and successful batch. The soap may have a slightly rough texture due to the slow saponification process.
Hot Process Soap Making
Hot process soap making involves heating the mixture to speed up the saponification process, resulting in a faster cure time of 1-2 weeks. This method produces a smoother, more rustic-looking bar with a slightly different texture compared to cold process soap. Hot process soap making is often preferred by soap makers who want to make larger batches or need a quicker turnaround time. However, it requires more equipment and can be more difficult to mold and cut.
Melt and Pour Soap Making
Melt and pour soap making involves melting a pre-made soap base and adding fragrance and color before pouring into molds. This method is the quickest and easiest of the three types and is often used by beginners or those who want to make soap as a craft or gift. Melt and pour soap making allows for a wide range of customization options, including adding essential oils, herbs, and exfoliants. However, it may not be suitable for those looking for an all-natural soap, as the pre-made base often contains synthetic ingredients.

Adding Scent and Color to Your Soap
Adding scent and color to your soap can be a fun and creative way to customize your bars. There are many natural and synthetic options for adding scent and color to your soap, including fragrance oils, essential oils, herbs, spices, and clays. When adding scent and color to your soap, it is important to use high-quality ingredients and follow recommended usage rates.
Fragrance Oils
Fragrance oils are synthetic oils that are specifically designed for use in soap making. They come in a wide range of scents, from floral and fruity to earthy and spicy. Fragrance oils are often more potent than essential oils, which means you need less of them to achieve a strong scent. However, they may not be suitable for those looking for an all-natural soap.
Essential Oils
Essential oils are derived from natural plant sources and provide a more subtle and natural scent than fragrance oils. Essential oils also offer therapeutic benefits, such as calming or energizing properties. Some popular essential oils for soap making include lavender, peppermint, and tea tree. However, they can be more expensive than fragrance oils and require a larger amount to achieve a strong scent.
Natural Colorants
Natural colorants such as herbs, spices, and clays can add a beautiful and unique look to your soap. For example, adding turmeric can give your soap a yellow tint, while adding spirulina can create a beautiful green color. However, natural colorants may fade over time and may not provide as vivid a color as synthetic colorants.
Synthetic Colorants
Synthetic colorants such as micas, oxides, and ultramarines are specifically designed for use in soap making and offer a wide range of vivid and vibrant colors. Synthetic colorants are easy to use and provide consistent results. However, they are not natural and may not be suitable for those looking for an all-natural soap.
Troubleshooting Common Soap Making Issues
Soap making is a fun and rewarding hobby, but it can also be challenging at times. Some common issues that soap makers may encounter include separation, air pockets, cracking, soft or mushy soap, and soap that doesn’t lather.
Separation can occur when the lye water and oils are not mixed thoroughly enough. This can cause a layer of oil or lye water to form on top of the mixture, making it difficult to pour into molds. To prevent separation, it’s important to use a stick blender to thoroughly blend the mixture until it reaches a thick, creamy consistency.
Air pockets can occur when the soap is not poured evenly into the mold or when tapping the mold to remove air pockets is not done thoroughly enough. To prevent air pockets, pour the mixture evenly into the mold and tap it gently on a flat surface to remove any air pockets. You can also use a toothpick or skewer to pop any visible air pockets.
Cracking can occur when the soap is left in the mold for too long or when the temperature is too cold or too hot. To prevent cracking, remove the soap from the mold after 24-48 hours and cut it into bars. Allow the bars to cure for 4-6 weeks in a cool, dry place.
Soft or mushy soap can occur when the lye or oils are not measured accurately or when the soap is not allowed to cure for long enough. To prevent soft or mushy soap, use a digital scale to measure the lye and oils accurately and allow the soap to cure for 4-6 weeks in a cool, dry place.
Soap that doesn’t lather can occur when the oils used in the recipe are not suitable for soap making or when the soap is not allowed to cure for long enough. To prevent soap that doesn’t lather, use oils that are suitable for soap making and allow the soap to cure for 4-6 weeks in a cool, dry place.